Monday, November 7, 2011

In Progress

As usual, I have a few things that I am working on.  Unfortunately, most of what I am doing right now are bigger projects so they take me a lot longer to complete.

Firstly, I got this cabinet/media center/sideboard/whatever you want to call it from my brother-in-law a few months ago.  He & my sister bought and moved into his childhood home (which his mother was selling) and some of his parents' old furniture was left for them. 

They were getting rid of this and when I saw it, I figured with some fun colorful paint and some new screens etc., it could be really cool.  I've seen tons of redos likes this on all the crafty blogs I read and I really like the way they end up looking.

Here is the before photos...

 A close up of the detail.
 I plan on painting a bright turquoise or aqua and then using a glaze to bring out the details.  I think we will be using it as a sideboard in our dining room for the time being but eventually it may move to the living room as a media center (once we get a flatscreen in there).  At this point, we have removed all hardware & screens and have sanded and primed it.

The other big project I am working on is for my sister and her kids.  Gabrielle has kept her old dollhouse that my grandfather built and all the dollhouse furniture we used to own.  She wanted to redo it but she is bit hesistant when it comes to crafts (and I think she doesn't enjoy crafts as much as I do).  So I said I would give it a whirl as long as I could do whatever I want with the house in terms of paint, wallpaper, etc.

I have tons of ideas (thanks Pinterest!) as to what I will do with it. Just need to actually do it.  Also been inspired to finally start this after seeing Emily Henderson's I'm a Giant Challenge.  Can't get my act together to actually participate in that, but I am loving all the dollhouses that people are doing.  Very cool!

BUT before I can repaint the exterior of the house and reassemble it (sorry no pics of it), I need to determine if I can repaint our existing dollhouse furniture.  And I have to determine what colors.  Because this is what our vintage furniture looks like and right now it dictates a whole "late 70's/early 80's vibe" that I just don't want to go with.  Way to orange/red for my tastes.  Although I do love that Gabe actually kept all this furniture for 25+ years.  She's a crazy pack rat.  Sometimes that pays off.

The living room set (have to say I actually don't mind the orange in the bookshelf, but the brown has got to go).  I really envision a more gray/blue/modern vibe for the house.
 The bathroom set.
 The bedroom.  Love the rolltop desk, vanity, and dresser complete with mini hangers.  The only doll she still has is also in desperate need of a makeover.
 The kitchen.  I forgot how much detail is actually in these pieces.  For instance the fridge opens and there are little slide out bins and the dishwasher has baskets that slide out.  I may try to paint the fridge with chalkboard paint as I think that would be cool. You see that a lot on the internet and although I like that idea, I would never do it in my real house.  That is what this dollhouse is for...doing all the fun stuff I either wish I could do in my house or like but would never do in real life.
Wednesday, October 19, 2011

New Art

I'm a bit obsessed with Pinterest.  If you don't know what it is, it is a virtual pinboard that allows you to find all sorts of inspiration off the web , categorize it and share it with friends.  I have ideas pinned (saved) for my dream home, craft projects, recipes to try, party ideas, clothes to buy, etc..  This site is definitely a good way to waste time but an awesome way to become inspired.  I LOVE it!

So I have seen a ton of artwork being done using paint swatches/chips.  You know the free little paper things you pick up at Home Depot or Lowe's?  I wanted to do some new art for the living room and decided this would be a cool and easy project.

First, I had Darren build me this huge 4' x 4' wooden box (this is the back btw).  I wanted the piece to essentially look like a gallery wrapped canvas but did not want to shell out the $90 for a canvas this size.  Especially since I am just going to glue paper all over it.  Our total for the wood was something like $20.

Oh and I must mention, that I am proud of Darren for building this for me.  He does not consider himself to be a carpenter or handy kind of guy and he did this very easily.
 This is how it looked as I started gluing and laying out the color swatches as I went.  Yes, I took a lot of swatches over the course of a few trips to the hardware store and yes, it was a bit awkward to take so many.  But we did end up buying stuff for the house every time we went, so I don't feel too bad about it.
 Here is the finished piece getting varnished.
I love how this looks and can't wait until we hang it up.  I tried to keep several shades of the same color together so there would be blocks of color and I also varied how much I overlapped them as I glued them down.  I didn't want it to look perfect and have all the pieces be the same size.  In the end,  I think it kind of looks like pixels on a computer. 

We'll see how it looks in the room this weekend.  Now onto the next piece of art!

Tuesday, October 18, 2011

Pillows

We (and by we, I really mean just me) are a little tired of the way our living/dining room looks.  The same artwork, furniture etc. has been here pretty much since we moved in 5 years ago, and that is just too long without a change.  The only thing that HAS changed in that time is the way the furniture is arranged (which frankly can only be in 2 different ways now) and the addition of so many kid/baby toys.

First, we bought a new fairly neutral rug for the living area.  The old one was browns and blues and it kind of dictated what you could do.  So we bought a fairly inexpensive large rug (we have 2 small children so we want to be able to toss it in a few years) that is just browns.

Our brown couches (they form a sectional when together) have seen better days, but are still basically in very good condition.  Again I think I am just tired of them.  They came with 2 medium (roughly 20 inch) pillows that were the same color as the couch.  And they were on the couch for 5 years until I finally decided to make some new pillows to help liven up the place.

I found some fun, modern fabric to make 8 pillows (5 go on the big couch and 3 on the smaller loveseat) using this awesome tutorial.  If you are frightened of zippers, don't be!  This is the best way to make pillows in my opinion.  It allows you to have a zipper (so you can take off the covers and wash them! yay!), but keeps it hidden so that the zipper pull doesn't scratch you (like my old couch pillows did).  And it does not require an invisible zipper like other tutorials I have found.

Anyways, here is the final product (all on the big couch...not how they normally lie).  Ignore the dining room mess in the back.  Working on that area after I do 2 new pieces of art for the living room. Hoping to make a new table for that area (with my father-in-law's help), get new chairs, make a big piece of wall art, and refinish a piece to use as a sideboard too. 

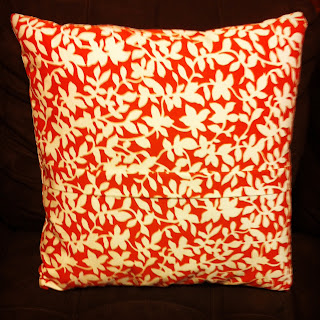
 I was very excited to finally get to use some chevron...love that pattern!  Here is a close up of the back...you can kind of see the flap where the zipper is hidden.  Not too noticeable on busy fabrics like this one.
 The flap is much more noticeable on the chevron pillows...the first one I did, I tried to match up the pattern and that was just a beast so for the 2nd chevron pillow, I intentionally turned the fabric for the flap because I thought it looked better. 
I'm very happy with how they turned out and it really was a quick project.  Only took me about 4.5 hours total which includes all the cutting, ironing, pinning and sewing.  Not bad for 8 pillows!

Thursday, October 6, 2011

My "Things"...Ha!

Awhile back, my sister-in-law's sister-in-law (say that 3 times fast!), gave us some of her twin boys' old clothes. Included in this stash were 2 "Thing" onesies (you know, Thing 1 & Thing 2 from Cat in the Hat?). Anyways, I almost got rid of both since I don't have twins but then figured that I could do something for the kids with them.

Obviously, I did not have to do anything with Ryan's since he can fit in the onesie. But for Ava, I used the Sienna Dress pattern from Lil Blue Boo (that I have used before and LOVE) to upcycle some old shirts into a dress. I then appliqued the "Thing" onto it. Needless to say, she was very excited and told me all day how she & Ryan were twins. And everyone else that would listen (her teachers, classmates, daddy, etc.)

So here they are, my "Things". Ava is "Thing 1" and Ryan is "Thing 2."

I have such nice, cute "Things" don't I?

Tuesday, September 13, 2011

More Tooth Pillows

As I mentioned in a previous post, I have 8 tooth pillows to make for all my kids & my nieces and nephews.  I have now finished 5 of them. I figure the 3 youngest can wait since 2 of them are under a year old and my niece is 2 1/2.  It will be awhile before they lose their teeth.  I'm glad I have done so many because now I know the the easiest order in which to make these (in terms of embroidering and attaching the button eyes, etc.).

Here are the 4 latest pillows.
From left to right: Emily's, Ian's Sheriff, Ava's & Lexie's.  As you see all the girls got tooth fairy pillows in different colors.

 Close up shots: (I also put everyone's initial on them)
Ian's
 Emily's
 Lexie's
 And for Ava (since she is my kiddo), I let her pick out what eyes she wanted and just to be a little different, we tried a new skirt...this time I attached the felt to a ribbon and tied it around for a more fitted look.
All in all, I am pretty pleased with them and of course in person they look so much cuter.  I still love that the mouth is a pocket for the tooth...you wouldn't know it just to look at it.

Friday, September 2, 2011

Wearing the Onesie

Finally got around to snapping some photos of Ryan in his onesie.  Almost waited too late to put him in this (I forgot I used a Gerber onesie to make the pattern and they run small).  He probably will only get to wear it a handful of times before he grows out of it.  Oh well. 


And then I made Darren put on his new grey shirt with black & white stripes and pose with Ryan in his matching shirt (no, they won't ever do this in public nor would I expect them to).

And btw, I used a 60's filter on these in case you were wondering why the photos looked different.  Just changing it up a bit.

Wednesday, August 17, 2011

Another Onesie

I finally got around to making another onesie from one of Darren's shirts.  I said when I made the first one, that I would make more so here the second one.  This time I switched it up a bit and added the button panel and used some rib knit on the color and near the snaps.
 I actually made this a few months back but forgot to post about it and at any rate, Ryan was too small for it since I made it based on a Gerber 6 month onesie size.  He actually may be able to fit into now...will have to try it out this weekend to see.

Here is Darren back when he used to wear this shirt.  He actually bought another shirt that is very similar to this one (same color scheme but stripes are slightly different) so maybe I can get the boys to wear them and match?  Ha ha ha!  Not sure if D would go for that or not.

Sunday, August 14, 2011

Tooth Fairy Pillow

I have been wanting to make one of these for so long...ever since I saw this post on mmmcrafts 2 years ago.  I finally have a reason too.  My niece Sawyer has lost 2 teeth and is about to lose another.  So I decided to go ahead and make her a pillow.  Of course, this means I also should go ahead and make all the kids I know (my kids and all my nieces and nephews  - that's 8 kids total) one too.  Thankfully only Sawyer and my nephew Ian have lost teeth so far so I have a bit of time before I have to make the others. But Ava has already been bugging me for hers so I am sure she'll get one sooner rather than later.

So here is Sawyer's tooth fairy...so cute! I love that the mouth is also a pocket for the tooth and can be used by the tooth fairy to leave some coins or small trinket.  I added a little S on the skirt but other than that it's pretty close to the examples that mmmcrafts did.  So great that this was a free pattern and really fairly easy to do...hardest part for me was embroidery since I don't usually do that and attaching buttons but it was not hard to figure out how to do those.  Here she is:

Monday, June 27, 2011

More Upcycling

Awhile back my sister gave me this cute sun dress since she was not wearing it anymore.
 I had borrowed this dress several years ago when I went to Mexico as evidenced here.
 I decided to try to wear it the other day, and really just wasn't feeling it.  Not sure if it's because I just had a baby or if it's because I'm super pale but it just was no longer flattering on me.  Not to mention that the lining on this dress only came down so far (the last 2 ruffles did not have lining and you could see that) -- it always bothered me.  So I was going to try to turn it into a top for me.  BUT when I tried that on, it too did not look flattering.

So what's a girl to do? Answer: turn it into a dress for their 4 year old daughter.  I just took in the seams in the top (I did not even mess with the skirt part...it actually looked good full) and adjusted the straps.  She of course loves it since she only wants to wear dresses every day.  Nice free way to give her a new one.

Wednesday, June 8, 2011

A Busy Week

After awhile of not really doing anything creative, I whipped out 3 new dresses this week...crazy!  That never happens.  But I once again bought an amazing pattern from Little Blue Boo.  This time the pattern was for me--yeah!  It is called the pieced tunic dress and here is my first attempt.

Front:
Back: 

This was made using all old shirts of mine (4 total, the red Cross Canadian Ragweed shirt, a striped Old Navy shirt, a purple shirt, and a brown shirt).  I love the funkiness of it and think it turned out really cute.  I did modify the pattern slightly with the waistband part to try to lengthen the dress a bit but it still ended up a little short so I think this is more of a tunic or I might use it as a beach cover up.  I also made the size medium (which I normally am) but since I am only 2 months post partum, I probably should have gone up a size as my chest is a bit bigger than normal.  Also the red shirt I used was probably not as stretchy as it should have been (it was a bit stiff due to the print on it) and that did not help.  But I modified the chest part before I sewed it by adding a few scraps to it.

Would love to show you a photo of me in it, but since it is kind of short and I am super pale right now, it wouldn't be pretty. :)

Dress #2 was for Ava using some of my old shirts.  It's a bit crazy as I don't have too many coordinating shirts on hand but I still like the overall look and since this was the first time to make this LBB pattern (the Sienna dress), I figured I should use what I had rather than possibly mess up stuff I buy.

This used my old Hula Hut/Keep Austin Weird shirt, a shirt we got from the Duck, NC fire department 2 or 3 years ago and a black shirt of Darren's.

Front:

 Back:
 And then I made another dress like this one. Loved that one last year and wanted to do another one.  Ava actually fits in the one I made last year since I ended up adding a white layer at the bottom to lengthen it.  Here is her new one (I think she likes it!).  This one was just 2 shirts (one of them being the rest of the purple one I used in my tunic).
 The 4T size on this one is a little big in the chest part for her but that just means she can wear it next year too.  Besides if you tie it higher (which I did) it fits just fine.  That or I can end up adding the loops on the back like last time.

So excited about these and want to make more...just need more cool shirts.  I'll be on the lookout!

Tuesday, May 31, 2011

Little Man's Onesie

Remember this post?  The one about me making a onesie out of Darren's old shirt?  Well here is said onesie in action:

Little man gets lots of love and kisses from his sister.  Times like this make my heart melt.

Teacher Gifts

So it has been awhile since I have posted anything on this blog...sorry about that.  But in all fairness, I have not done much that is worth posting about here, what with giving birth to this guy about 2 months ago: 
Such a cutie...but he kind of takes up a lot of my time these days (in a good way).

Anyways, I finally did do a little project about a month ago for A's teachers as an end of the school year gift. And yes, I am just now posting it...procrastination may be my middle name.

  I whipped up these little gathered clutches (amazing tutorial from Anna at Noodlehead, see here) to hold the gift cards I got the teachers, and I really should have made myself one too as they are too adorable and are pretty easy to make.  Oh well at least I finally tackled this project since it has been on my to do list for quite some time now.  Maybe when I find time again, I'll make myself one.  I highly recommend this tutorial by the way.  Very easy to follow and such a quick project!

I finished these off with little "handmade with love" tags with A's picture on them.
 And inside, in addition to the gift card, I included a little photo of Ava saying Thanks. (see below for photo).  Always think it is nice to include a little personal photo with the gift. (I try to put A's photo on valentine's cards as well as birthday presents to friends so they can easily see who it's from -- especially helps since most 4 year olds cannot read yet.)
 Apparently I like polka dots since both clutches were lined on the inside with that pattern.  Best part was that I used some of my fabric scraps to make these.
Photo that was included.

Hopefully, I'll have some time to do more projects soon!!

Monday, March 7, 2011

A Whole New Wardrobe

So I went a little overboard on making stuff for the new baby.  I originally intended to make one or two onesies/burp cloth sets but once I got started, I guess I could not stop.  Part of the problem is that I won a set of fat quarters over the holidays from one of my favorite blog's giveaways and since it was mainly blue fabric, I just had to use it for my own son.  And I couldn't just pick one!

I ended up making 6 sets (onesie, burp cloth & pee pee teepee) and 2 other onesies.  Hard to tell from the photo but I made 2 whale onesies, a "r' one, a robot one, a small fry on, a zebra one, an elephant one and a bulldog onesie.
Close up shot of the pee pee teepees...Ava always thinks these are party hats for dolls.  They do look like it! Think she will be surprised to see how these are actually used.

And a shot of my nice burp cloths...I used leftover chenille and minky dot for the back and they are random sizes as a result. I love the way these look -- it will be a shame when they get all dirty. :)
I am really slow at posting my projects these days...I made these about 2 weeks ago.  I have a list of things to make before I have this baby in 4 weeks and for some reason I keep adding in random projects before finishing my list.  For instance, I just painted a Hello Kitty picture for Ava's room this weekend (photo to come) as well as made another tank dress for her.  And the other week I made a tank dress for myself that can be worn now and should work post-pregnancy due to the empire elastic waistband.  We'll see if I get around to posting all these photos...so little time and so much to do!!

Sunday, February 13, 2011

Nursery/Guest Room

Finally kind of got our nursery/guest room together.  Yes, we are not getting rid of our guest room which really only is used for 1 set of guests - my hubby's parents.  Baby boy does not need his own room for awhile as he can easily stay in our room when necessary.

It's not completely done (still one naked wall and a pink pillow that needs to be recovered) but it looks so much better.  I really stink at before photos...I would blame it on the pregnancy but I know that is not why I don't take them.  I just forget and get excited and jump right in without thinking about the fact that people like before/after photos.  I know I do.

Anyways, here is the crib shot with the letter paintings I made (all paintings in this room were previous paintings I had done -  after them hanging in our house for 5+ years, it was time for a change so I did not mind painting over them).

Bedding is Dwellstudio for Target (I love DS stuff..too cute) and crib is our old one we used for Ava 4 yrs ago.
Close up (or closer) of the paintings before they were hung.  I did each letter in a different font using the colors in the baby bedding.  Although the pictures make it hard to see, each one is distressed a bit and has cracks/stain on it.  I covered each canvas in newspaper strips and mod podge, then painted, sanded, applied crackle paint, and applied stain for the look.  I kind of like that they are not perfect.  The photos really don't do these justice. 
 Shot of the guest bed and new curtains (darn wrinkles won't come out...anyone know how to get wrinkles out of twill/acrylic backed curtains?  can't wash them and the iron did nothing).  The painting above the bed used to be of 2 girls dancing on a red background but I whipped out a quick color block painting to tie the bedding colors of the guest bed to the new baby bedding.
 Close up of painting.  Seriously this thing took like 30 minutes for me to make and I actually really like how it turned out.
 And a shot of the room looking from guest bed out.  This painting was inspired by one I saw on the blog How About Orange.  She had painted this for her living room (in different colors and in a more professional way) and I thought it was so cool that I made my own version.  Again I distressed it a bit so the colors would be a bit more muted and match better with everything in the room.
Other than these changes, we just bought a cubicle system for inside the closet (you know the kind with canvas bins...we got ours in light green, khaki and chocolate) and put some baskets on the shelves in there to hold all the baby essentials (diapers, wipes, blankets & burp cloths).

Friday, February 11, 2011

Appliques!

So I did another order for a friend of a friend.  I took a break from sewing stuff for my own kids (who are we kidding, I have been procrastinatin anyways) to make these onesie/burp cloth sets.  Sometimes it's just easier to make stuff for other people in a timely manner.

Just took photos of the appliques, they are all ones I have done before except the excavator which had to be resized for an infant onesie.

Giraffes (always a hit!)
 Doves
 Construction equipment (bulldozers and an excavator)

For My Boy

Well the nesting period has definitely begun and I have been busy working on some projects for my soon-to-be born son.

First up, a onesie made from an old shirt of my husbands (wish I had taken a before photo but since I cut this shirt up a few months back, it was out of the question - basically this was a men's polo shirt with collar).  I used an old gerber onesie that I cut up for pattern pieces and then just cut out my pieces and sewed it up!  I think it is pretty cute and super cool that it used to be Darren's.   And then I made a pee pee teepee to match (no photo of that though).
 Then, I decided to make a nursing cover since I gave my old one away to my friend who had her baby in January. I was thinking I would not need one this time around but then realized it would be nice to have one around just in case.  I didn't want to ask for mine back (that would be rude!) so I used this super easy tutorial from Freshly Picked's blog.  Easy peasy and a good excuse to use a yard of fabric from my overly full sewing drawer.
2 items down and a few more to go!
Related Posts Plugin for WordPress, Blogger...