Friday, June 29, 2012

Reversible Bubble Skirt

I bought yet another Lil Blue Boo pattern today...the reversible bubble skirt!  It is super easy and very cute.

Here is Ava modeling her new skirt.  I think next time I will make mine an inch or two longer because it is really short.  Will be cute with leggings for the fall but just a bit short on Ava.

Of course I only took photos of the one side!

Thursday, June 14, 2012

Dining Set

So now that summer is here, I have not had as much time to do any projects. So much harder when Ava is not in school. All I've managed to do are a few hoodies here and there. However I finallly decided to do something with my old dining set. And by old, I mean it is my parents from some 25 years ago. It was given to me years ago and I kept thinking we'd get something else but then other things that I'd rather have kept popping up and we talked about moving at one point so I didn't want to get something that might not fit the new space.

Anyways, this set is completely not my style and I am shocked that I have had it so long and not done anything to it.  If I had known that I would own it for so long, I really would have done something years ago.

Anyways, here is what I am doing right now.  Painting all the chairs a turquoisy blue (this is the same paint I used on the media cabinet I did awhile back so it was free!)


  A vast improvement if I do say so myself.  Here are the before photos of the table (please excuse the mess, the very old rug etc. - it's all a bit embarrassing that this is what a corner of our living/dining area looks like).
 A shot of the hutch (it has been empty since we moved it out for the kiddos parties because I knew I was going to do something with it soon)

And here is the inspiration photos I found that made me finally decide to do something about my table/hutch/chairs.  The final product will be slightly different as I think I am going to stain the table top a dark espresso color (since we have a brown couch in the same room as our set) and I think the hutch and table legs will be painted black and have that "Pottery Barn" distressed finish on them. I also am debating if I will make or buy chair cushions so for awhile I would assume that we won't have any.  And I am hoping to buy a colorful striped rug from IKEA that ties in all the colors of my room.  We'll see. 

Keep posted for the final photos.  I still haven't finished the chairs (I can only work at night on this and it's been too hot!) and I know the table and hutch will take awhile to complete too.

Thursday, May 10, 2012

Hoodies


Check out the new hoodies in my Etsy shop (link on sidebar).

This one is a 12-18 month old size.

 And this one is a 4T (although Ava just barely could fit in it and she is a 5/5T).

I'm working on some more hoodies and some tshirt dresses and will be listing those as soon as I can.  Need to get some stuff in the 2T-5T range so some of those will be in the middle sizes.

Tuesday, April 24, 2012

Etsy

So after a year or so of not having anything to put in my Etsy shop, I have finally reopened it.  mokru is back in business!  Check it out...

Right now I have a few ruffle tank/tshirt dresses and a few peasant dress (mainly in smaller sizes) but I am hoping to soon add more stuff like upcycled t-shirt dress, hoodies and boy t-shirts.

Let me know what you think!

Check it out in the sidebar to the left or just click here: http://www.etsy.com/shop/mokru

Monday, April 23, 2012

Recent Projects

I knocked out a few quick projects recently.  First up, I made 2 sock bunnies based on this tutorial from LBB.

Pretty cute and so easy!  Putting them in the kiddos Easter basket.  Would love to have put button eyes on them, but since Ryan is so little, I decided both should just be embroidered.

 Then, since I promised Ava she would get a Daddy dress just like Ryan's Daddy shirt, I made her a simple tshirt dress that says "I Love Daddy" using Darren's old shirts. How fitting.  She of course loved it.  Just wish I had taken a better photo of it. But maybe I will try to take a photo of the kids in their Daddy duds together..couldn't manage to get one that day.

Monday, March 19, 2012

Sneak Peek

Ava turns 5 this week.  Crazy!  She is having a pajama/rainbow themed party at the house this Saturday where all the little girls will get glitter tattoos, make rock band bracelets, make their own ice cream sundae and play musical chairs and other fun games.

One of these games is a version of "Pin the Tail on the Donkey".  This one is called "Pin the Ava on the Sleeping Bag" in keeping with her pajama theme.  So today, I made the game with a little help from Miss Ava herself.

Each of the girls will get an Ava (with their name on it) and will try to pin it on the board.  If I actually had photos of all 12 girls coming, I would have made the pieces look like each girl, but alas, I did not have everybody's photo.  Too bad! 

I also got all crazy and made her invitations, water bottle labels, party favor tags and hair barrettes (for part of the favors).  Will post photos after the party.

Here's a look at her invite (I changed the address for privacy).  I love using photo invites because 1) they are unique 2) custom and 3) inexpensive. Good things all around!

Shelves

I made these book shelves for Ry's room about a month and half ago and we finally hung them up yesterday.  Yay!!  I used these plans from Ana White (great site - highly recommend checking it out) to build them.  I am very proud of myself as I had to use power tools (a scroll saw for one) which I never do.

I think they turned out well and were worth the $30 I spent for all 4 (note: we can't hang the 4th yet since Ry will definitely try to pull it down).  I also used paint we had on hand...I believe it is the same can of oops paint we have used on the back door, an outdoor table as well as various other projects.  Best $5 spent.

Tank Dress

This is just sad.  Not the dress I made, just the fact that I have had the fabric cut for this dress FOR A YEAR.  Finally got around to making this simple and super cute tank dress for Ava.  Thankfully, the tank top/cut fabric was still long enough once they were sewn together. And it worked out because I was able to use my brand new serger for this project.

Definitely will have to take a better photo of Ava in this.  I also whipped out another one later that week.  I had also cut the fabric a year ago.  Better late than never!

Daddy Shirt

I don't think a week goes by that I don't hear about how much Ryan looks like Darren (deja vu for me...think it was the same with Ava).

So seeing as I have been wanting to try freezer paper stenciling, I decided to make Ryan a "Daddy" shirt so that people really could compare the two. Especially when Darren is not with us. I originally intended to save this as a surprise for Father's Day but sadly I am bad at keeping secrets.

Oh well, Darren liked it anyways (even if he found it a bit funny that his face is now on his son's shirt).   Ava, of course, saw Ry's shirt and said that she too, needs a Daddy shirt. Maybe I can make her a cute "Daddy" tshirt dress?


Monday, January 23, 2012

Book Page Wreaths

My sister asked me to make a book page wreath for her for Christmas.  Sadly, I just got around to it -- she knew I was not going to have it done in time for the holidays with all the stuff I had going on but I still feel a little bad.

I have seen these all over the internet especially while cruising around Pinterest, the most addicting site ever.  I ended up kind of following this tutorial from Living with Lindsay.  I have to say it was super easy and only cost me $1.50 since I used a foam plumbing tube from Home Depot as the base instead of a store bought styrofoam wreath and I had the book and hot glue on hand.   The plumbing tube was obviously a lot cheaper and you can customize it to whatever size you want.  I am shocked that people sell these for $40 or more and that people actually buy them for that much.  I think I'd rather spend an hour making one instead of spending that much money.

The finished wreath. 

 I ended up making one for myself too to hang over my fireplace.  Still need to figure out the arrangement on my mantle (and eventually make a nice mantle slipcover out of wood so it looks better) but for now, it will do. Think I have to make at least one more of these as my mom saw the photo and said she had to have one too!  Good thing they are cheap and don't take too long to do.

Saturday, January 7, 2012

Up Next: Dollhouse

Next big project is the one I have been talking about for awhile.  Just now getting to it.  My sister's old dollhouse.  Here is the front of the house before...you can see it is falling apart.  I plan on removing all the dirty old windows and shutters and giving this baby a complete overhaul.  We shall see how long it takes me.  My grandfather built this so I plan on keeping the overall structure the same but will try to modernize it a little.  Once I actually assemble the house, I'll take more pictures but I plan on painting it before I assemble so wanted to have some kind of before photo.

Here's hoping I can knock this out in a month or two.

Finished!

I know. I know.  It's been awhile since my last post...I'm always full of excuses but in all fairness Sept through Dec are always busy!

Anyways, if you remember my last post about the media center, I am now finished with it!  Woo hoo!

Here is the before again:
And the after!  I painted it a tealish kind of color and then used a brown glaze over it.   Very different, right?  I personally am loving it!
I used all the original hardware and just spray painted them with an oiled bronze paint.
 And because I thought the original screens were a bit out dated, I went ahead and replaced it with some aluminum screen sheeting in a much more modern pattern. It also provided a little more coverage so you can't see what is in the cabinet as much.  Still open but less so.  I also spray painted the new screens in the bronze paint.

The before:
 And the after (sorry for such bright lighting!)
 And here it is in the house with the new TV on it.  We actually have the TV centered now since we were able to put the satellite box in it once we drilled holes but as usual I'm too lazy to get a good pic.  Maybe once the whole living room is complete (more artwork, hopefully new floors in a few months), I'll take a better pic.

Monday, November 7, 2011

In Progress

As usual, I have a few things that I am working on.  Unfortunately, most of what I am doing right now are bigger projects so they take me a lot longer to complete.

Firstly, I got this cabinet/media center/sideboard/whatever you want to call it from my brother-in-law a few months ago.  He & my sister bought and moved into his childhood home (which his mother was selling) and some of his parents' old furniture was left for them. 

They were getting rid of this and when I saw it, I figured with some fun colorful paint and some new screens etc., it could be really cool.  I've seen tons of redos likes this on all the crafty blogs I read and I really like the way they end up looking.

Here is the before photos...

 A close up of the detail.
 I plan on painting a bright turquoise or aqua and then using a glaze to bring out the details.  I think we will be using it as a sideboard in our dining room for the time being but eventually it may move to the living room as a media center (once we get a flatscreen in there).  At this point, we have removed all hardware & screens and have sanded and primed it.

The other big project I am working on is for my sister and her kids.  Gabrielle has kept her old dollhouse that my grandfather built and all the dollhouse furniture we used to own.  She wanted to redo it but she is bit hesistant when it comes to crafts (and I think she doesn't enjoy crafts as much as I do).  So I said I would give it a whirl as long as I could do whatever I want with the house in terms of paint, wallpaper, etc.

I have tons of ideas (thanks Pinterest!) as to what I will do with it. Just need to actually do it.  Also been inspired to finally start this after seeing Emily Henderson's I'm a Giant Challenge.  Can't get my act together to actually participate in that, but I am loving all the dollhouses that people are doing.  Very cool!

BUT before I can repaint the exterior of the house and reassemble it (sorry no pics of it), I need to determine if I can repaint our existing dollhouse furniture.  And I have to determine what colors.  Because this is what our vintage furniture looks like and right now it dictates a whole "late 70's/early 80's vibe" that I just don't want to go with.  Way to orange/red for my tastes.  Although I do love that Gabe actually kept all this furniture for 25+ years.  She's a crazy pack rat.  Sometimes that pays off.

The living room set (have to say I actually don't mind the orange in the bookshelf, but the brown has got to go).  I really envision a more gray/blue/modern vibe for the house.
 The bathroom set.
 The bedroom.  Love the rolltop desk, vanity, and dresser complete with mini hangers.  The only doll she still has is also in desperate need of a makeover.
 The kitchen.  I forgot how much detail is actually in these pieces.  For instance the fridge opens and there are little slide out bins and the dishwasher has baskets that slide out.  I may try to paint the fridge with chalkboard paint as I think that would be cool. You see that a lot on the internet and although I like that idea, I would never do it in my real house.  That is what this dollhouse is for...doing all the fun stuff I either wish I could do in my house or like but would never do in real life.

Wednesday, October 19, 2011

New Art

I'm a bit obsessed with Pinterest.  If you don't know what it is, it is a virtual pinboard that allows you to find all sorts of inspiration off the web , categorize it and share it with friends.  I have ideas pinned (saved) for my dream home, craft projects, recipes to try, party ideas, clothes to buy, etc..  This site is definitely a good way to waste time but an awesome way to become inspired.  I LOVE it!

So I have seen a ton of artwork being done using paint swatches/chips.  You know the free little paper things you pick up at Home Depot or Lowe's?  I wanted to do some new art for the living room and decided this would be a cool and easy project.

First, I had Darren build me this huge 4' x 4' wooden box (this is the back btw).  I wanted the piece to essentially look like a gallery wrapped canvas but did not want to shell out the $90 for a canvas this size.  Especially since I am just going to glue paper all over it.  Our total for the wood was something like $20.

Oh and I must mention, that I am proud of Darren for building this for me.  He does not consider himself to be a carpenter or handy kind of guy and he did this very easily.
 This is how it looked as I started gluing and laying out the color swatches as I went.  Yes, I took a lot of swatches over the course of a few trips to the hardware store and yes, it was a bit awkward to take so many.  But we did end up buying stuff for the house every time we went, so I don't feel too bad about it.
 Here is the finished piece getting varnished.
I love how this looks and can't wait until we hang it up.  I tried to keep several shades of the same color together so there would be blocks of color and I also varied how much I overlapped them as I glued them down.  I didn't want it to look perfect and have all the pieces be the same size.  In the end,  I think it kind of looks like pixels on a computer. 

We'll see how it looks in the room this weekend.  Now onto the next piece of art!

Tuesday, October 18, 2011

Pillows

We (and by we, I really mean just me) are a little tired of the way our living/dining room looks.  The same artwork, furniture etc. has been here pretty much since we moved in 5 years ago, and that is just too long without a change.  The only thing that HAS changed in that time is the way the furniture is arranged (which frankly can only be in 2 different ways now) and the addition of so many kid/baby toys.

First, we bought a new fairly neutral rug for the living area.  The old one was browns and blues and it kind of dictated what you could do.  So we bought a fairly inexpensive large rug (we have 2 small children so we want to be able to toss it in a few years) that is just browns.

Our brown couches (they form a sectional when together) have seen better days, but are still basically in very good condition.  Again I think I am just tired of them.  They came with 2 medium (roughly 20 inch) pillows that were the same color as the couch.  And they were on the couch for 5 years until I finally decided to make some new pillows to help liven up the place.

I found some fun, modern fabric to make 8 pillows (5 go on the big couch and 3 on the smaller loveseat) using this awesome tutorial.  If you are frightened of zippers, don't be!  This is the best way to make pillows in my opinion.  It allows you to have a zipper (so you can take off the covers and wash them! yay!), but keeps it hidden so that the zipper pull doesn't scratch you (like my old couch pillows did).  And it does not require an invisible zipper like other tutorials I have found.

Anyways, here is the final product (all on the big couch...not how they normally lie).  Ignore the dining room mess in the back.  Working on that area after I do 2 new pieces of art for the living room. Hoping to make a new table for that area (with my father-in-law's help), get new chairs, make a big piece of wall art, and refinish a piece to use as a sideboard too. 

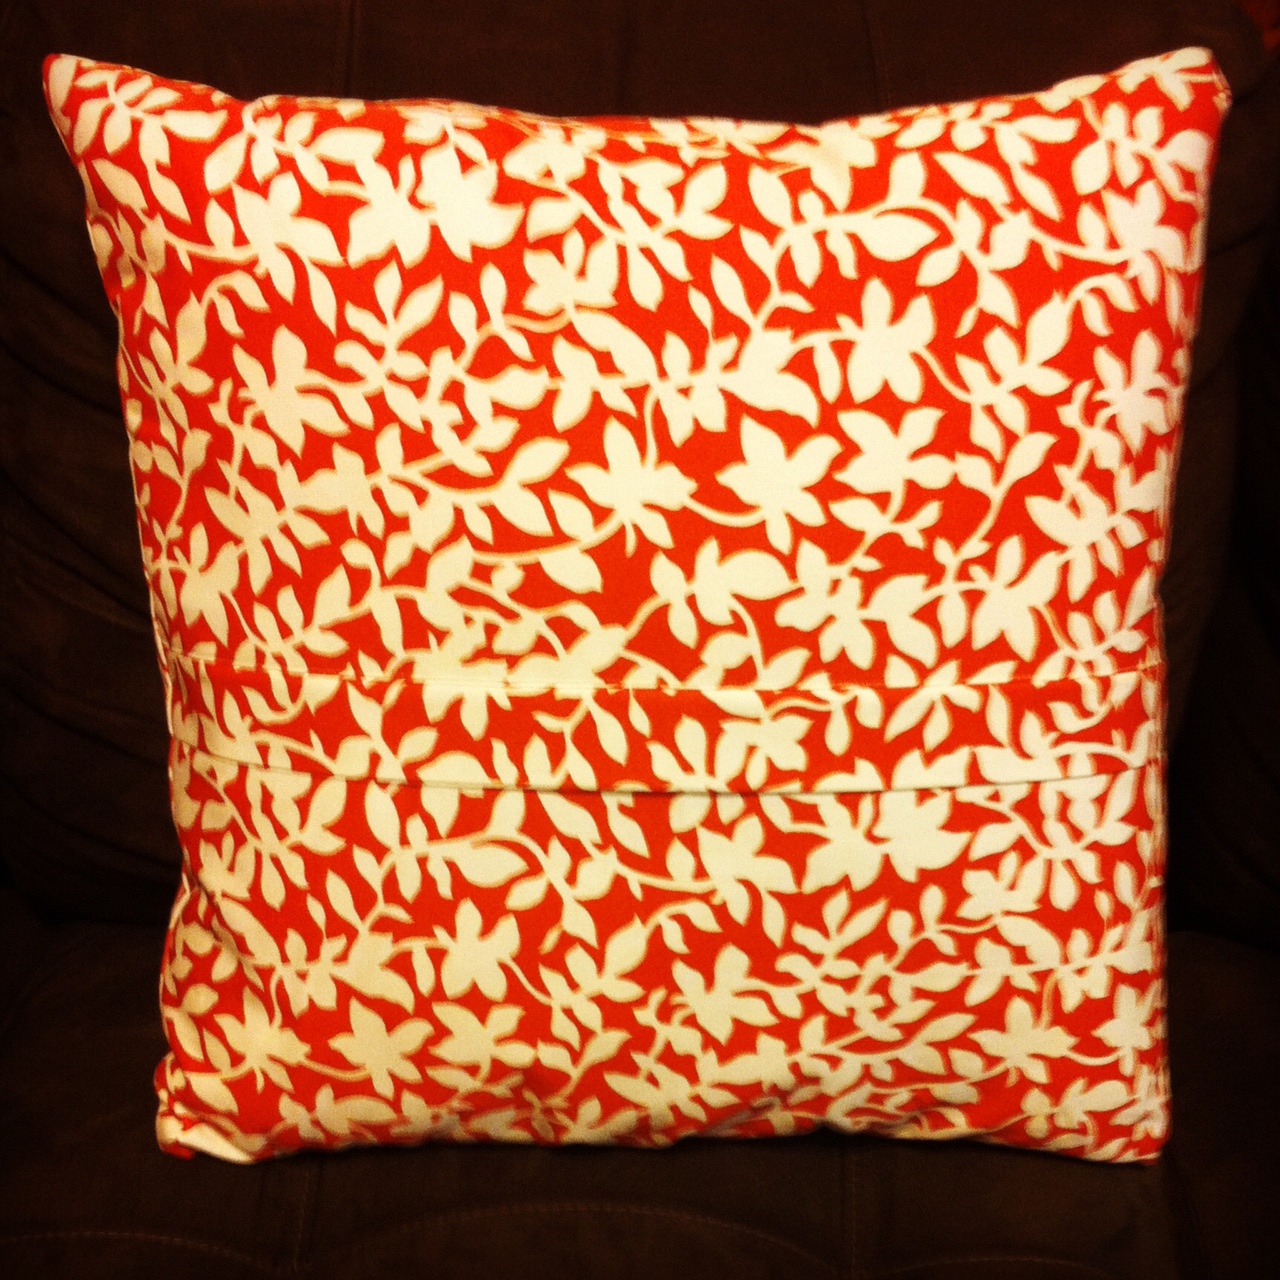
 I was very excited to finally get to use some chevron...love that pattern!  Here is a close up of the back...you can kind of see the flap where the zipper is hidden.  Not too noticeable on busy fabrics like this one.
 The flap is much more noticeable on the chevron pillows...the first one I did, I tried to match up the pattern and that was just a beast so for the 2nd chevron pillow, I intentionally turned the fabric for the flap because I thought it looked better. 
I'm very happy with how they turned out and it really was a quick project.  Only took me about 4.5 hours total which includes all the cutting, ironing, pinning and sewing.  Not bad for 8 pillows!

Thursday, October 6, 2011

My "Things"...Ha!

Awhile back, my sister-in-law's sister-in-law (say that 3 times fast!), gave us some of her twin boys' old clothes. Included in this stash were 2 "Thing" onesies (you know, Thing 1 & Thing 2 from Cat in the Hat?). Anyways, I almost got rid of both since I don't have twins but then figured that I could do something for the kids with them.

Obviously, I did not have to do anything with Ryan's since he can fit in the onesie. But for Ava, I used the Sienna Dress pattern from Lil Blue Boo (that I have used before and LOVE) to upcycle some old shirts into a dress. I then appliqued the "Thing" onto it. Needless to say, she was very excited and told me all day how she & Ryan were twins. And everyone else that would listen (her teachers, classmates, daddy, etc.)

So here they are, my "Things". Ava is "Thing 1" and Ryan is "Thing 2."

I have such nice, cute "Things" don't I?

Tuesday, September 13, 2011

More Tooth Pillows

As I mentioned in a previous post, I have 8 tooth pillows to make for all my kids & my nieces and nephews.  I have now finished 5 of them. I figure the 3 youngest can wait since 2 of them are under a year old and my niece is 2 1/2.  It will be awhile before they lose their teeth.  I'm glad I have done so many because now I know the the easiest order in which to make these (in terms of embroidering and attaching the button eyes, etc.).

Here are the 4 latest pillows.
From left to right: Emily's, Ian's Sheriff, Ava's & Lexie's.  As you see all the girls got tooth fairy pillows in different colors.

 Close up shots: (I also put everyone's initial on them)
Ian's
 Emily's
 Lexie's
 And for Ava (since she is my kiddo), I let her pick out what eyes she wanted and just to be a little different, we tried a new skirt...this time I attached the felt to a ribbon and tied it around for a more fitted look.
All in all, I am pretty pleased with them and of course in person they look so much cuter.  I still love that the mouth is a pocket for the tooth...you wouldn't know it just to look at it.

Friday, September 2, 2011

Wearing the Onesie

Finally got around to snapping some photos of Ryan in his onesie.  Almost waited too late to put him in this (I forgot I used a Gerber onesie to make the pattern and they run small).  He probably will only get to wear it a handful of times before he grows out of it.  Oh well. 


And then I made Darren put on his new grey shirt with black & white stripes and pose with Ryan in his matching shirt (no, they won't ever do this in public nor would I expect them to).

And btw, I used a 60's filter on these in case you were wondering why the photos looked different.  Just changing it up a bit.

Wednesday, August 17, 2011

Another Onesie

I finally got around to making another onesie from one of Darren's shirts.  I said when I made the first one, that I would make more so here the second one.  This time I switched it up a bit and added the button panel and used some rib knit on the color and near the snaps.
 I actually made this a few months back but forgot to post about it and at any rate, Ryan was too small for it since I made it based on a Gerber 6 month onesie size.  He actually may be able to fit into now...will have to try it out this weekend to see.

Here is Darren back when he used to wear this shirt.  He actually bought another shirt that is very similar to this one (same color scheme but stripes are slightly different) so maybe I can get the boys to wear them and match?  Ha ha ha!  Not sure if D would go for that or not.
Related Posts Plugin for WordPress, Blogger...